viernes, 2 de junio de 2017

Generando clases en Java para el CFDI 3.3

Seguramente están enterados de que el Comprobante Fiscal Digital por Intener (CFDI) tiene una nueva versión: la 3.3.

El Servicio de Administración Tributaria (SAT) , nos ha proporcionado la información del Anexo 20 donde se indican los requisitos con los que debe cumplir la versión 3.3.  La información puede ser consultada en la página http://www.sat.gob.mx/informacion_fiscal/factura_electronica/Paginas/Anexo_20_version3.3.aspx.

En la página podemos encontrar los siguientes archivos .XSD:
Para generar las clases de Java será necesario descargar los archivos .xsd y ejecutar el comando XJC incluido en el JDK de java.  Mi recomendación es que se cree un folder llamado src en la misma carpeta donde descargaron los archivos .xsd

Para genear las clases Java del Timbre Fiscal Digital

xjc TimbreFiscalDigitalv11.xsd -p mx.sat.tfd11 -d src\

Para generar las clases del CFDI 3.3 

Primero es necesario generar un archivo que se llame binding.xjb, donde vamos a indicar el número máximo de enumeraciones al momento de generar las clases java, de lo contrario, si no generamos éste archivo, obtendremos un error como este:

[WARNING] El tipo simple "c_CodigoPostal" no se ha asignado a Enum debido al límite de EnumMemberSizeCap. Recuento de facetas: 95,777, límite actual: 256. Puede utilizar el atributo de personalización "typesafeEnumMaxMembers" para ampliar el límite.
  línea 229 de http://www.sat.gob.mx/sitio_internet/cfd/catalogos/catCFDI.xsd
 El contenido del archivo binding.xjb es el siguiente:


Después, simplemente hay que ejecutar siguiente comando para generar los archivos Java del CFDI:


xjc cfdv33.xsd -p mx.sat.cfd33 -b binding.xjb -d src\

Listo ya tenemos nuestras clases Java.

Espero les sea de utilidad.

lunes, 15 de mayo de 2017

FXTableViewUtil: An utility class for JavaFX to create columns easily in a TableView

I had to move a desktop application in VB6 because the customer needed to run their app in Windows, Mac and Linux so, we decided to use Java with JavaFX. SceneBuilder help me a lot to build user interfaces. Most of the screens are only tho show information in a TableView component.

Usually to create columns in a TableView you have to code something like this:

@FXML
    private TableView table;

    public static void main(String[] args) {
        launch(args);
    }

    @Override
    public void start(Stage stage) {
        Scene scene = new Scene(new Group());
        stage.setTitle("Table View Sample");
        stage.setWidth(450);
        stage.setHeight(550);

        final Label label = new Label("Address Book");
        label.setFont(new Font("Arial", 20));

        table.setEditable(true);

        // Create Columns
        TableColumn firstNameCol = new TableColumn("First Name");
        firstNameCol.setMinWidth(100);
        firstNameCol.setCellValueFactory(new PropertyValueFactory<>("firstName"));

        TableColumn lastNameCol = new TableColumn("Last Name");
        lastNameCol.setMinWidth(100);
        lastNameCol.setCellValueFactory(new PropertyValueFactory<>("lastName"));

        TableColumn emailCol = new TableColumn("Email");
        emailCol.setMinWidth(200);
        emailCol.setCellValueFactory(new PropertyValueFactory<>("email"));

       
        // add columns to TableView
        table.getColumns().addAll(firstNameCol, lastNameCol, emailCol);
    }

As you can see you have to write several lines of code to add columns.

I wrote an utility class to create columns easly in a TableView, so now you only need to write something like this:

 @Override
    public void initialize(URL url, ResourceBundle rb) {
        tableViewUtil.createColumns(Person.class, tableView, headers, personList);
    }

FXTableViewUtil has this methods

createColumns

Creates columns at runtime, you only need to add a TableView with no columns in your FXML file and pass the POJO class to be used and the object list to populate the TableView.  Columns added have a default width.

Check that this screen has a TableView without columns

TableView with no columns
Once you call method createColumns columns are added to TableView (using same with for all columns)
TableView after call createColumns method

  
assignColumns

Use this method if you already designed you TableView with columns. The important this to use this method is to assign the property name to Id in FXML file.

This screen already have TableColumns with custom with for each column (and different order)

TableView with columns at design time

Once you call method assignColumns FXTableViewUtil uses current design and assign the data to corresponding columns
TableView with data after call assignColumns


You can download project from Github at https://github.com/tmsanchez/fxtabledemo

viernes, 14 de abril de 2017

Generating a script for FirebirdSQL from MySQLWorkbench


 MySQLWorkbench allows to design database model easily and also provides an option to generate the SQL script.   By default script is generated for MySQL, but, what if you need to generate a SQL script for FirebirdSQL?.

Using Python you cand create custom plugins to access to model properties  (table and columns definitions for example) please visit this link for more info Scripting and Plugin Development

So, I decided to write a plugin to generate a SQL Script for FirebirdSQL. My goal it's just to show how can we access to schemas, tables and columns properties using classes already defined by MySQLWorkbench.

Script can be downloaded from github: https://github.com/tmsanchez/workbenchscripts/blob/master/mysqlToFB_grt.py
 
Note an for MySQLWorkbench 8.x check this http://tmsanchezdev.blogspot.com/2021/05/updated-plugings-for-mysqlworkbench-8x.html

Once script is downloaded do following:

1. Go to menu: Script / Install Plugin Module...
2. In Select Module to Install select mysqlToFB_grt.py and clic on Open
 
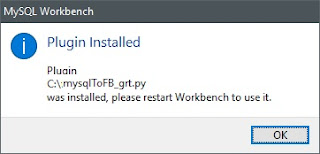
 3. Clic on OK button on Plugin Installed dialog and Restart MySQL
4. Open your model and go to menu Tools / Catalog / Database schema to Firebird Script
5. Provide an filename for the script in the Save Dialog and clic Save Button
6. Once script was generated clic OK button on following dialog


That's all, I hope this can help you to generate Firebird scripts and to write your own plugins.